Revitalize Your Orchids with Care
Posted on 20/05/2025
Revitalize Your Orchids with Care: A Comprehensive Guide
Orchids are among the most exquisite and delicate houseplants that enthusiasts strive to keep vibrant all year round. However, over time, even healthy orchids can lose their luster, struggling with bloom loss, yellowing leaves, or weak roots. Fortunately, revitalizing your orchids with the right care can restore their beauty and vigor. This guide explores the best practices, tips, and solutions for orchid revival, ensuring your prized plants thrive for years to come.

Understanding Why Orchids Need Revitalization
Before diving into specific orchid care techniques, it's crucial to understand that orchids sometimes enter periods of dormancy, stress, or ill health due to a variety of factors:
- Improper watering techniques that cause root rot or dehydration
- Insufficient light or exposure to harsh direct sunlight
- Nutrient-deficient soil mixes or lack of fertilization
- Overcrowded roots in small pots
- Pest infestations or diseases
Tuning in to these causes is the first step to revitalize your orchid plants and restore their natural brilliance.
Key Steps to Revitalize Your Orchids
1. Assess Orchid Health
Begin with a gentle assessment. Inspect leaves, roots, and the general condition of the plant:
- Are leaves turning yellow or wrinkled?
- Do the roots look plump and green or brown and mushy?
- Is the orchid showing any sign of pests like scale, aphids, or mealybugs?
- Are there dead flower spikes or dried pseudobulbs?
Accurate observation will help you target the revitalization process where it's needed most.
2. Repotting: Give Your Orchid Room to Grow
Repotting stressed orchids can often work wonders. Orchids generally need repotting every one to two years, especially if their roots are overcrowded or the potting medium has broken down.
- Choose the right time: Best done after blooming, or if roots show signs of distress.
- Select suitable orchid bark or moss: Use high-quality, specialized orchid mixes that offer aeration and moisture regulation.
- Trim dead roots: Using sterile scissors, remove all brown or mushy roots before repotting.
- Place your orchid in a fresh pot that's slightly larger but not oversized.
This fresh start can breathe new life into your orchid, promoting healthier root systems and vigorous growth.
3. Optimize Watering Practices
Orchid roots are sensitive to both under and over-watering. To revitalize your orchids, adjust your schedule to provide consistent, appropriate hydration:
- Check the potting mix: Water only when the top inch feels dry.
- Use lukewarm distilled or rainwater: Tap water can harbor chemicals harmful to orchids.
- Ensure complete drainage: Never allow orchids to sit in stagnant water; empty saucers after watering.
- Consider the "soak and dry" method, which thoroughly wets roots but allows them time to dry between waterings.
Proper hydration can revitalize a struggling orchid within a few weeks, with new roots and leaves emerging as a sign of recovery.
4. Perfect the Lighting Environment
Bright, indirect light is essential for orchid health. To revitalize orchid blooms and leaves:
- Place orchids near an east- or north-facing window for gentle morning sun.
- Use sheer curtains to diffuse intense light that may burn leaves.
- In winter, consider grow lights to supplement natural sunlight.
Orchids with access to sufficient, non-direct light display deeper green leaves and a higher likelihood of re-blooming.
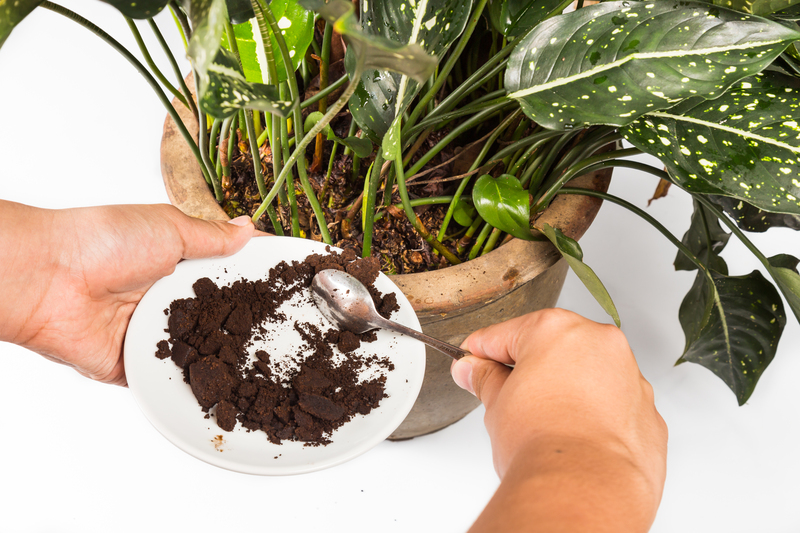
5. Feed Your Orchids Properly
Fertilization plays a pivotal role in orchid revitalization:
- Choose a balanced orchid fertilizer: Look for formulas labeled 20-20-20 or similar.
- Apply fertilizer at half-strength every other week during growing seasons.
- Flush the potting mix with plain water once a month to avoid salt buildup.
- Use phosphorus-rich "bloom booster" formulas when encouraging flowering.
Nutrient-rich care helps generate vibrant leaves and plentiful flowers, the hallmark of healthy, revived orchids.
6. Pruning and Grooming Your Orchid
To rejuvenate your orchids, don't neglect maintenance tasks:
- Trim away dead or withered flower spikes near their base.
- Remove yellowed, wilted, or spotted leaves.
- Clean leaves gently with a damp cloth to remove dust and aid photosynthesis.
- Sanitize tools before and after use to prevent disease transmission.
Regular pruning encourages new shoots and a tidy, healthy structure, crucial for orchid regeneration.
7. Manage Humidity and Air Circulation
Orchids crave a humid, well-ventilated environment:
- Add humidity trays filled with water and pebbles under pots.
- Mist leaves lightly, avoiding excess moisture on flowers and roots.
- Place a small fan nearby to promote air circulation without creating drafts.
This simulates natural tropical conditions, helping orchids recover from stress and preventing fungal problems.
8. Pest and Disease Control
Pests and diseases can quickly debilitate an orchid's recovery. For effective orchid revitalization:
- Inspect regularly for pests like spider mites, aphids, and scale.
- Treat infestations immediately with insecticidal soap or neem oil.
- Isolate affected orchids to prevent spread.
- Remove all infected tissues, and consider repotting in fresh medium.
Consistent vigilance led by prompt action keeps your orchids strong and on their way to full revitalization.
Special Tips for Orchid Revival
Reviving Orchids After Flower Loss
After an orchid drops its blooms, many owners mistakenly assume the plant is dying. In reality, this is a natural rest period. Focus on:
- Reducing watering slightly until new shoots appear.
- Feeding with a lower-nitrogen formula to promote root and stem growth.
- Maintaining stable humidity and temperature.
Dealing With Root Rot
If your orchid's roots turn brown, mushy, and foul-smelling, immediate action is necessary:
- Trim all affected roots with sterilized scissors.
- Allow the plant to air-dry before repotting in dry, fresh medium.
- Avoid watering for a few days after repotting to prevent further rot.
With careful management, your orchid can develop robust new roots and return to health.
Encouraging Re-Blooming
Once your orchid is healthy again, foster re-blooming by:
- Creating a day-night temperature drop of 10?F (6?C) for several weeks.
- Using a bloom fertilizer during the flowering season.
- Gently rotating the pot to ensure even light exposure.
This mimics natural cues and can stimulate a burst of fresh, colorful blooms.
Best Practices for Long-Term Orchid Vitality
After revitalizing your orchids, ongoing care is the key to sustainable vitality:
- Maintain a seasonal care routine: adjust water, temperature, and fertilization as seasons change.
- Monitor roots and leaves: healthy roots and plump, green leaves are signs of an orchid's well-being.
- Record your care methods: note which techniques lead to the most blooms or fastest growth.
- Avoid sudden environmental changes like drafts or direct hot air vents.
Popular Orchids to Revitalize at Home
- Phalaenopsis (Moth Orchid): Easiest to adapt and recover, perfect for beginners.
- Cattleya: Responds well to repotting and careful light management.
- Dendrobium: Thrives with proper pruning and periodic dormancy.
- Oncidium: Loves higher humidity and frequent misting during revitalization.
Frequently Asked Questions on Orchid Revival
How do I know if my orchid is salvageable?
If your orchid still has some green roots or healthy leaves, there's high potential for revival. Orchids with all brown, shriveled roots or entirely wilted leaves may be too far gone, but giving it a thorough repot and care is still worth a try.
How long does it take to revitalize an orchid?
This depends on the severity of stress and the orchid species. With proper orchid revitalization methods, improvement is usually visible in 4-8 weeks, with new leaf or root growth as a positive sign.
Can I divide orchids to help them recover?
Mature, multi-pseudobulb orchids like Cattleya can be divided when repotting, often stimulating new growth. Always ensure each division has at least three healthy pseudobulbs.
Is soaking orchid roots a good revitalization technique?
Gentle soaking once a week can hydrate struggling orchids, but ongoing water-logging leads to root rot. Use this only as a temporary measure during acute stress.
Conclusion: Let Your Orchids Thrive with Thoughtful Care
Once you revitalize your orchids with care, you'll be rewarded with lush foliage and breathtaking blooms. Remember, orchids are living works of art that respond to attentive, consistent care. By mastering the techniques above and tuning in to your orchid's unique needs, you can transform a struggling plant into a spectacular centerpiece, glowing with renewed vitality. Start your orchid revival journey today--and watch your blooms flourish like never before!
Related Resources
- American Orchid Society: Orchid Care
- Royal Horticultural Society: Orchid Problems
- Gardeners.com: Orchid Growing Guide
Latest Posts
Transforming Your Yard into a Canine Paradise
Container Gardening Tips for Maximizing Yield
Turn Down the Wind: Practical Garden Tips
Design a Garden That Inspires Kids' Creativity
Nurture your little ones' love for nature with a garden haven